How to Embed Custom HTML
TileDocs makes it easy for users to insert custom HTML code blocks into their documentation pages. The process is straightforward and requires no technical expertise.
Here’s how it works
Insert a Custom HTML Block
When you're editing a page, choose the option to insert a custom HTML block. This will bring up a dialog box with two tabs and a preview area, so you can immediately see how your HTML will look when rendered.
Two Tabs
The dialog offers two tabs:
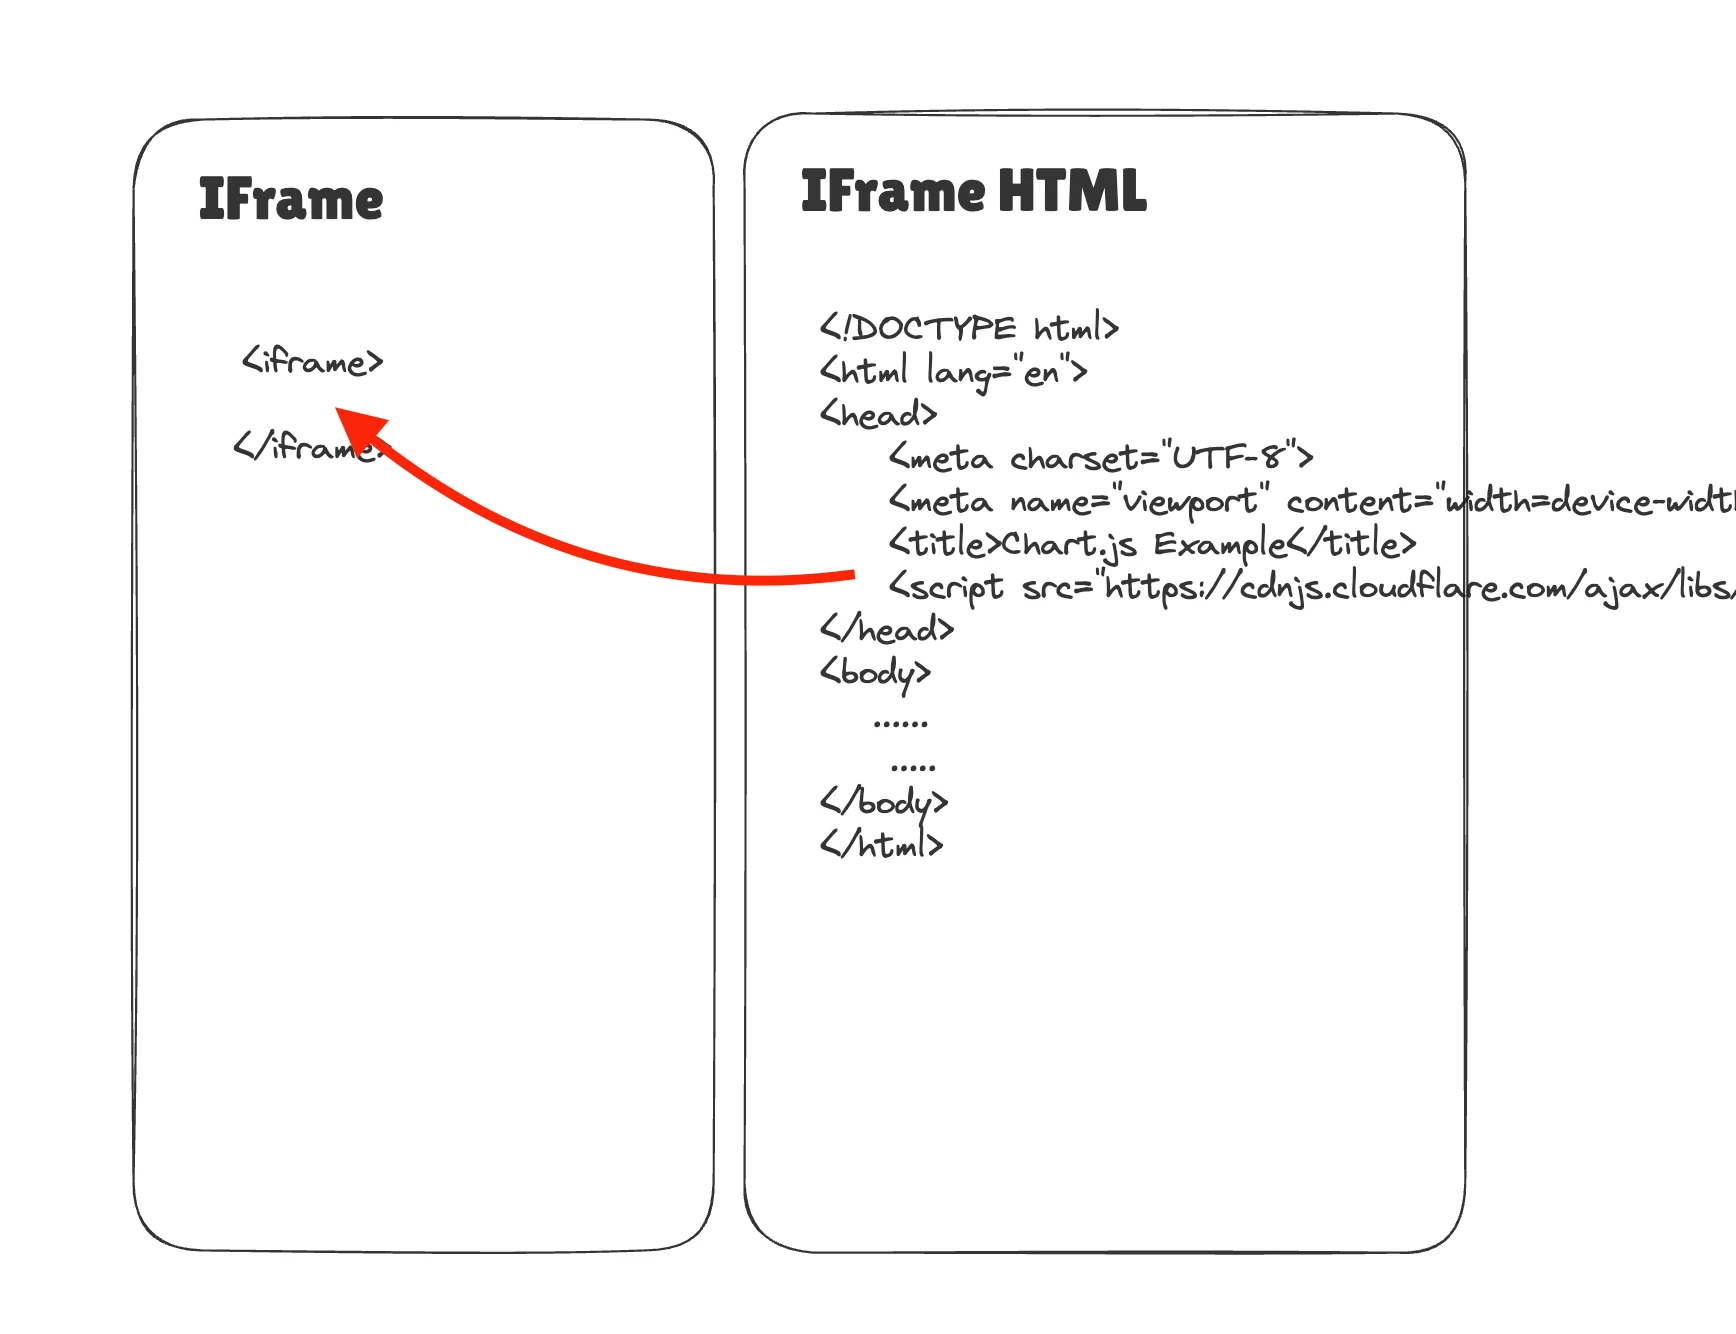
- IFrame: Here, you can write any HTML code, not just
<iframe>tags. You have full freedom to add whatever custom content you need for your documentation. - IFrame HTML: This is where you write the HTML code that will be embedded directly into the
srcdocattribute of the<iframe>element you write in the IFrame tab. Keep in mind, if there’s no<iframe>in the IFrame tab, the content from this tab won’t be applied.
HTML automatically injected into iframe
Preview Your HTML
As you write your custom HTML in either tab, the preview will automatically update, showing you how your code will appear on your documentation page.
Responsibility for Code
While you can insert any HTML code, please note that you are responsible for ensuring the security of the code you add, especially if your documentation is shared publicly or hosted on your own site. TileDocs gives you the freedom, but it's up to you to ensure everything is safe.
Example
If you want to see a practical use case, take a look at how to embed charts on your page in the Embed Charts section. This example shows how easily you can integrate interactive elements like charts into your documentation.